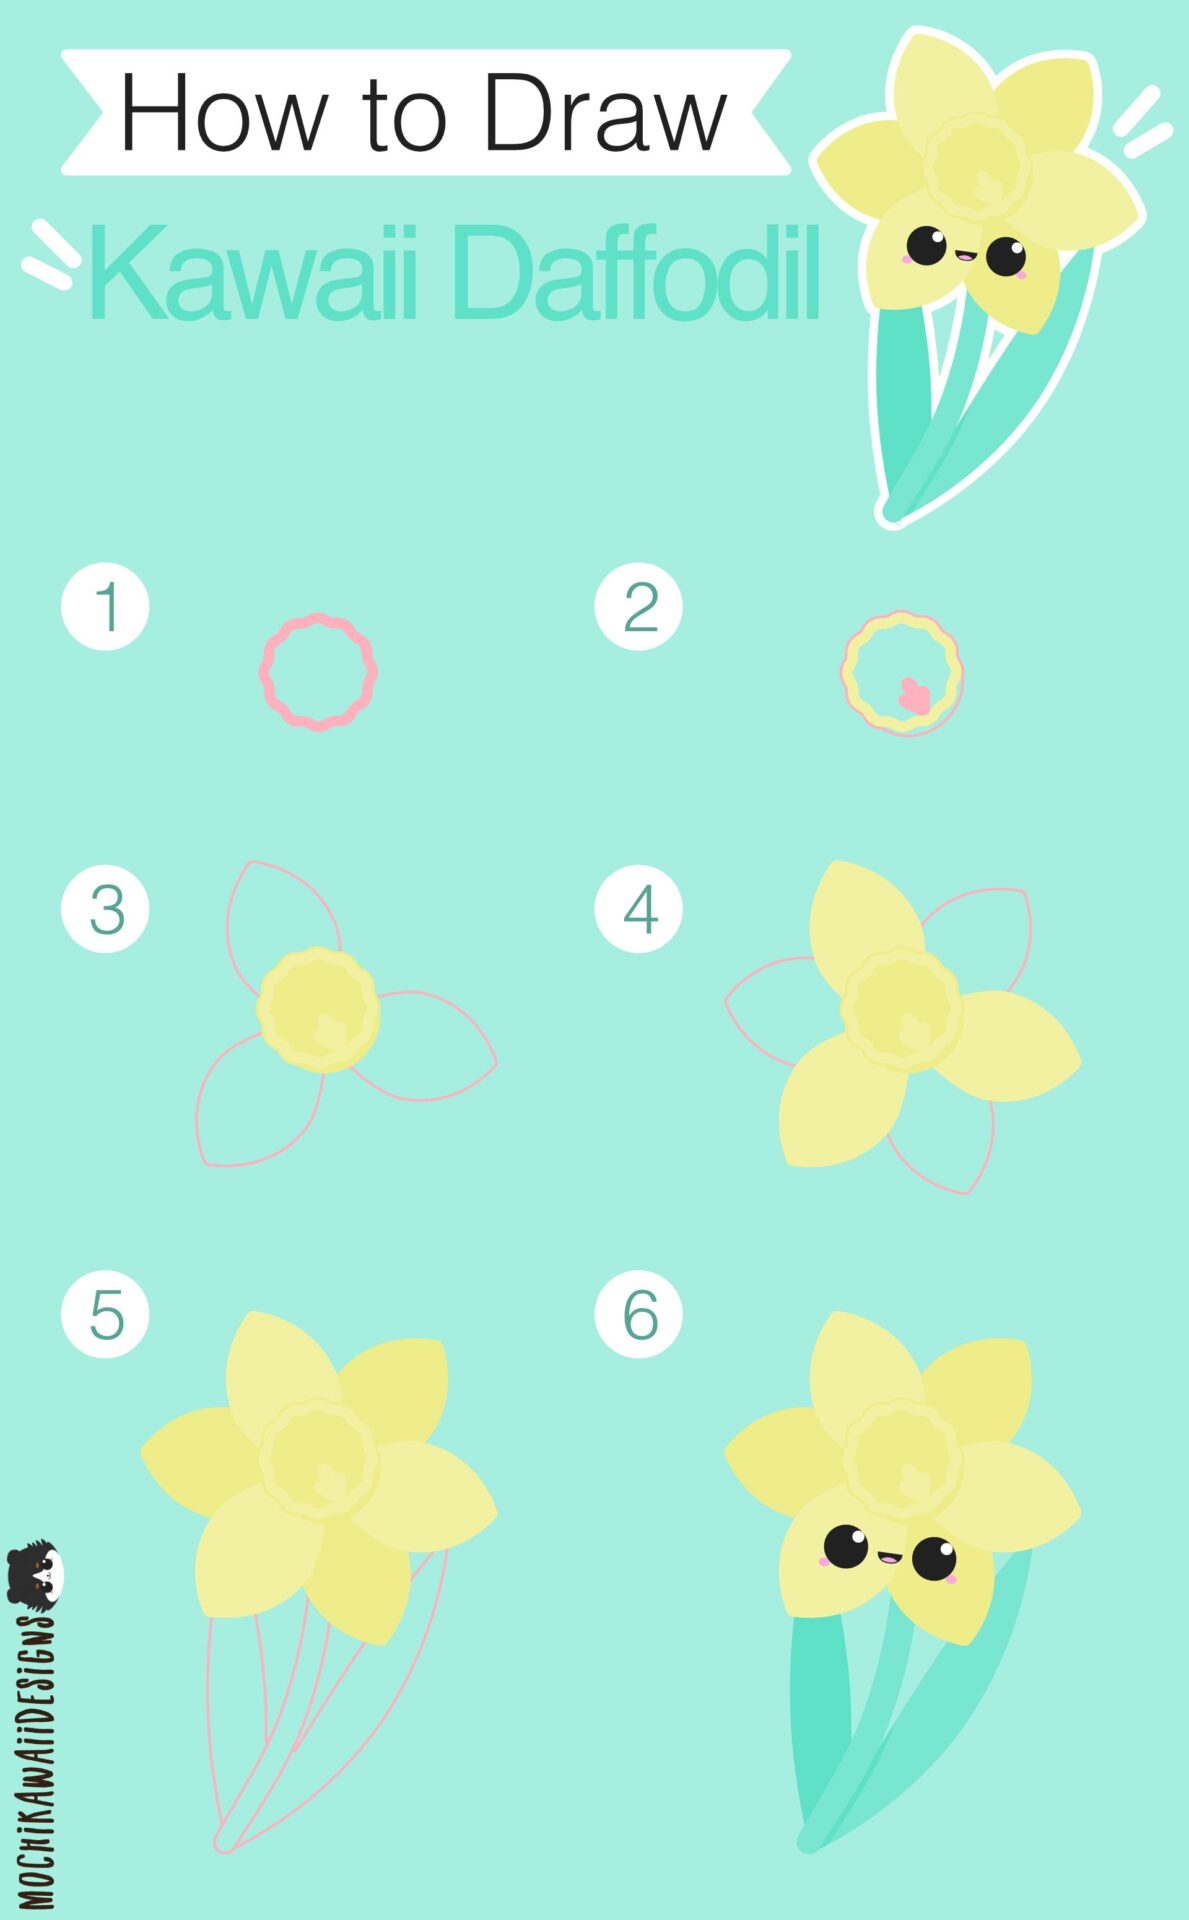
Learn step by step how to draw a cute kawaii daffodil. This is a tutorial if you want to create more flowers in addition to my flower designs – Find out how to draw your own kawaii daffodil here!
Start by drawing a thick circle with squiggly outside
Then add a thinner outline in a darker color, draw a little oval on the underside. Also add some pistils
When your center is finished, it's time to add some petals. So first draw three petals. Those are going to be a lighter color
Then draw the next three in the spaces in between and color them a little darker
Now you're done with the flower, so it's time to add a stem and leaves
Finally add the kawaii face to turn your daffodil into a kawaii daffodil and you're done
Now you can turn your drawing into a sticker, use it in your journal, turn it into a birthday card or whatever you like!
I really hope you enjoyed this quick and easy tutorial – If you decide to draw this kawaii daffodil, head over to my Instagram and share a picture, I would love to see it.